Wednesday, March 31, 2010

ABS Blog Carnival - Anticipation

This month’s ABS Blog Carnival theme is “anticipation.”

My first thought was to just post this picture and be done with it:
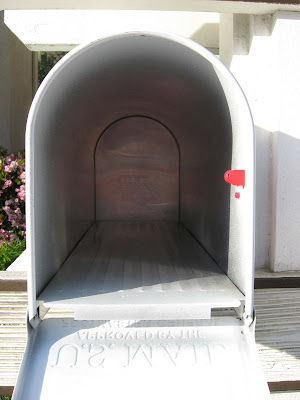


After all, for those of you who know my bead habits, this picture kind of says it all, right?

But, then I remembered that the guidelines for the Blog Carnival require that I somehow relate this theme specifically to “Art Beads.” I also realized that readers might be showing up here anticipating (ha! see how I did that?) a little more bang for their bloggy time than just one picture.

So, I started to really think about the concept of anticipation and I began to realize that it has had different meanings for me during different times in my life.

As a young child, I remember being so wound up with anticipation on Christmas Eve that I could not go to sleep no matter how hard I tried. I ended up crying in bed because I was so frustrated that I couldn’t fall asleep…because it had been patiently explained to me that if I didn’t fall asleep, Santa would never come.

My other childhood anticipation memory involves a ketchup bottle hovering over a hamburger while Carly Simon sings “Anticipaaaaaaation is making me wait…” in the background.

In college, I learned about anticipation’s dark side: dread. It was that awful feeling in the pit of my stomach the night before a final exam or the few moments before I stood up to give an oral presentation…en Francais (just to make things more difficult).

As I entered the working world I learned to anticipate questions that were likely to come up on a given project and have my answers ready to go.

Later on, I tried to anticipate what it would be like to be a mom, but I’ve learned that NO ONE can ever really prepare you for that particular job. I mean, where in any parenting manual is there a chapter on “what to do when your kid floods the entire second floor” or “how to get the three foot high pile of trash the kid has created out from behind the entertainment center.” Certainly, I never anticipated having to face all the daily dilemmas of parenting completely on my own.

As I was thinking through all these various encounters with anticipation, I even started to wonder whether or not animals “anticipate” and if they do, what does it feel like for them?


(anticipatory thought provided by our local front yard lizard)


(more animal anticipation musings provided by our local resident grouchy parrot - Zuni)

Lastly, I started to think about what involvement anticipation has in my creative process as an artist. Sometimes, a design pops into my head all but completed and all I have to do is the labor of physically putting it together. Not much anticipation there.

Most of the time, however, I start with a color or a theme or, in this case, a particular focal bead:


(Spirit Horse pendant from Star Spirit Studio on Etsy)

Then, I start to gradually build towards a final design from there. It’s the ability to anticipate that allows me to hold certain beads next to a focal piece and decide “yes, these go well with that” or “nope, not workin’.”

Should my secondary beads be these:


Or these:


What other stones would works in this design?


Or these:


or these:


And finally, the most anticipated question of all…will the end design fulfill my expectations?

Stay tuned to tomorrow's entry to find out. Until then, you can anticipate the results ;-)


KJ

Tuesday, March 30, 2010

Adventures in Resin - Part III

While bead buying/collecting will always be my number one obsessions, resin-ating (yep, I made that up 'cuz I am kree-a-tiv that way) is rapidly becoming a close second.

Or, it could just be brain damage from inhaling too many fumes.

Either way, I had another fun session with resin this weekend:


I'm still playing around with crystals and scrapbooking papers. Look - no barcode showing this time! I learned my lesson and went through all my papers and snipped off the sections with barcodes or manufacturer's names printed on the back. That way, I will never have to worry about them showing through again!


I loved these two papers together - will go perfectly with denim! Also, I made a pendant with this in the last round, but it got ruined by bubbles. This time...bubble free!


These are patinated brass bezels from Patina Queen. I thought the aged look would go well with some Victorian pansy stickers I had in my old rubber stamping supply stash. The only complaint I have about these bezels is that they are VERY shallow so it's a bit more difficult to control the resin or to build up designs.


Which didn't stop me from using the same bezels while trying to be all artsy-fartsy and building up some kind of paper assemblage piece. It worked, but it would have been easier in a deeper bezel. These feature my own handmade papers (yep, I used to make my own paper back in the day - there's pretty much nothing I haven't attempted with my crafting obsessions over the years - oh, except for knitting - it scares me - I don't know why).


Then I punched some hearts out of metallic cardstock - the heart in the sun pendant is silver and the one in the night pendant is gold. Added some tiny metallic beads and confetti and some French words ('cuz everything sounds better en Francais, n'est-ce pas?) and slapped it all together with some resin. Funny thing on the words - I didn't seal them because I wanted the white paper to fade and just leave the print showing...but it only partially worked. I don't know why.


I'm always looking for daisy-related stuff for my mom so when I saw these glittery daisy and ladybug stickers that fit PERFECTLY inside the Patera bezels, well, they just had to become pendants. I'm pretty happy with them although in retrospect, I probably could have colored the metal area of the bezel that shows. But that's being really nitpicky.


Then, I still had some resin left over so I grabbed a couple of empty bezels, dumped in some sparkly stuff, and filled up with resin. Had some difficulties with these as HUGE bubbles developed and I had to keep popping them over and over which, in the process, created a big lump in beads in the pink pendant. You can't see it in the photo, and the actual resin surface is smooth. You can just tell that the bead layer is not evenly distributed. The blue/green one is PERFECT, tho.

And you know how much I looooove the perfection :-)

Tonight I get to go home and crack the molds I made at the same time I did all these bezels.

Fingers crossed that something good came out of the second round.


KJ

Monday, March 29, 2010

A Necklace and a Story

Story first...'cuz it's just so cute.

I tell a lot of funny stories about Ryan here - usually regarding things he has, um, altered? destroyed? taken apart? Because I have to laugh about those or I'd go nuts.

But, really, I'm probably doing him a disservice by not talking about what a great kid he is 95% of the time. For example...

On Saturday mornings, he has Tae Kwon Do class. Which he has been less and less excited about attending lately - he wants to switch to swimming. I've been struggling with where to draw the line on letting him quit vs. forcing him to keep doing something he's not that crazy about.

So, Saturday mornings have become a bit of a struggle to get him to class with a good attitude. This past Saturday was no exception and I was really frustrated by the time we got to class so I decided to get some errands done and then come back to pick him up rather than staying for the whole class. I got back just in time to watch the end of class.

When I arrived, Ryan was working one on one with a teenager who recently made black belt. They were running through the form that he needs to perfect in order to pass his green belt test. After repeating it several times, the instructor gave Ryan a break to go get some water.

I watched him go to the water cooler and fill up two cups of water and I thought "Why is he filling two cups? That's weird."

Next thing I knew, he was walking towards me holding the second cup and saying "Here, Mommy, you looked thirsty so I brought you a drink."

I started crying right in front of the master and all the other students and parents. It was so awesome to have a reminder that there is way more to him than just the times he gets in trouble or drives me crazy around the house.

Okay, enough of that. On to the necklace:


I started this piece with a great raku shell pendant from Star Spirit Studio on Etsy. It made me think of buried treasure scavenged from the sea floor so I grabbed a bunch of other odd bits and pieces to continue that theme.


Here's a closeup of the pendant - it really has lots of great colors in it from a deep wine to a pale gold with hints of blue, sage green and rose. Of course, my wonderfully fabulous photography skills were not up to capturing any of that.


A closeup of the necklace reveals some of the goodies that have been incorporated: a patinated brass sand dollar charm from Patina Queen, a tiny blue Czech crystal rondelle, a rose and gold alabaster vintage bead from Gemme Tresor, a sterling silver seahorse charm from Sadco, a gold owl coin from a local bead store and some brass chain.


On the other side, some copper seed beads and a tiny, textured gold disk; a foiled Murano glass bead; a silver coin charm; a deep purple Swarovski shell pearl and a couple of extra Czech crystals for sparkle.


The clasp is a patinated Vintaj brass hook and eye from Patina Queen. I added a rose gold alabaster bead and brass flower bead cap as a dangle.


Of course, that's where all the beads and charms REALLY came from. In my imagination, Melusine found them as she traveled through the various oceans of the world - picking through lost treasure from sunken Spanish galleons or finding Greek and Roman coins tossed overboard by sailors wishing for extra luck.

So, I named this necklace "Melusine's Treasure."

KJ

Friday, March 26, 2010

TGIP!!!

Thank goodness it's P***day (edited for those of you whose work naughtiness filters are being unreasonable about your need to view beady goodness on-line).


Elegant "Chantilly Lace" pewter charm from Mamacita Beadworks on Etsy. "Chantilly lace and a pretty face and a pony tail...hangin' down..."

Okay, so I am a big dork (like you didn't already know that if you read this blog on anything approaching a regular basis).

Also, I now have that song stuck in my head.


Hammered rings and toggle clasp from Cathy Dailey.


Sterling silver branch component from Fabulous Rocks on Etsy.


Dark pink and pale pink chalcedony brios from Fabulous Rocks on Etsy.


Golden sheen obsidian and pale pink chalcedony rondelles from GemmeTresor on Etsy.


Lots of ceramic goodness from Maccarroll on Etsy.


Striped pastel enameled lampwork bead pair from Flame Crazy on Etsy. These just scream out that they were delivered by the Easter bunny - so perfect for spring!


More Easter beady candy - these softly etched pastel lampwork spacer beads are from Alisha White.


Etched pastel disk beads from HMB Studios.


More etched lampwork disk deliciousness - this set is by Outwest on Etsy.

I am soooo ready for this week to be over...how about you? Here's to a great, creative and bead-filled weekend for all of us!


KJ

Thursday, March 25, 2010

Strange Creatures


Found this guy sunning himself on my porch this weekend. And no, I didn't cut off the picture in a weird spot - he's missing his tail. Their tails break off if something tries to catch them (ask my kid how I know this...blech!)

And Kelley W. begged me for a hermit crab update. Which was kinda hard because lately, all they've been doing is this:


They like to hide between the coconut mat and the back glass wall of the crabitat. Usually all three are piled on top of each other, but I did manage to catch Summers out for a crabby stroll recently:
Then I had to leave to go put new batteries in my camera (is it just me or do digital cameras suck up batteries in like, 2 seconds, or something?)
Anyway, when I got back, I took the lid off the crabitat so I could lean in for a better picture and I got a big surprise:


Summers was ON the ceiling! It's a good thing I looked at the lid before I took it all the way off or I would have missed him and we might have had a crabby accident.


Just hangin' around...

KJ (and Summers the crab)

Wednesday, March 24, 2010

Adventures in Resin - Part II

The Big Reveal!


Now, if I were doing this in the style of an American Idol results show, I would put in a whole bunch of uninteresting crap and filler here for about 20 pages and THEN have the results all squished down at the bottom.


But I HATE when they do that (which is why I DVR the show so I can fast forward to the good parts) so I'm not gonna put y'all through that kinda torture.


We'll start with the "totally sucks" results, move through the "okay, but could have been better" section, and then get to the stuff that actually came out okay (uh, assuming there is any of that which I'm not guaranteeing).


Here are all my small mold items - nearly all of which are totally ruined by cloudiness. GRRR!


I'm so disappointed. These would have been so cute except for the cloudiness. I can't figure it out because this is the same batch of resin that worked perfectly in other areas so it wasn't a mixing/proportion issue and it wasn't an environmental humidity issue.


Out of all the small molds, only this piece came out without any cloudiness. It does have a small bubble in it, but it's not very noticeable. Now, why would this one be fine and everything else had cloudiness issues? Weird.


I had better luck with the larger molds, although one of the rings still has some cloudy patches on one side.


This one came out perfectly, though. I used the holeless beads on this and just suspended them randomly in the resin. Some sank to the bottom and others floated on top and I kind of like the effect. I just wish that both pieces had turned out instead of one having cloudy patches. Again, can't figure out why one would be different than the other.


Out of all the molded items, this one came out the best. This was the one where I mixed the mica pigment into the resin and I got this gorgeous pearlized blue color. I have a ton more colors of mica pigments so I may have to do some more experiments like this. Also, no cloudiness.


All in all, the mold experiment was kind of a disaster. I had much better luck with the bezels.


In fact, I'd be totally satisfied with these had I not (like an idiot) used the part of the paper that had the bar code on the back. Ummm...DUH! All I can say in my defense is that it didn't show through like this until AFTER I poured the resin on it so I didn't even realize I'd used that part of the paper. It's a bummer because these are really cute otherwise.


Now THIS version came out perfectly. I'm totally happy with this and how CUTE is that strawberry?!


This one would be perfect except it's got a scattering of tiny bubbles right across the middle. I thought I'd checked and gotten rid of all of them, but these popped up later after I'd stopped checking on everything. Also, while I loved these papers together in real life, I'm not sure they actually have enough contrast to make a good design in miniature like this.


This one came out cute, though. I love the colors and the glittery scrapbook paper.


These both came out awesome and I can't wait to make them into some cool, sophisticated, Parisian jewelry. Vive la France!


My best results came with the Patera images and bezels. No bubbles, the pictures look great, I didn't overdo on adding "bling" to the pictures - awesome.


Lastly, I took a couple of the wooden butterflies I recently bought on Etsy and coated them with resin. I think they came out really well! I'm especially proud that I managed to do this without gumming up the holes that were already drilled in them! One guy even got some little pearls added to his wings. Perhaps I am not completely hopeless at this whole resin thing.

Especially now that I've gone out and bought REAL mold release (no more cooking spray) AND I've bought some silicon molding putty so I can make my own molds of things around the house. I'm determined to solve this whole resin molding thing!

Uh, plus, I still have a whole bag full of embellishments that didn't get used in the first go round and I need to do something with them.

So, stay tuned for more future resin adventures!

KJ