Thursday, February 20, 2014

Claymation

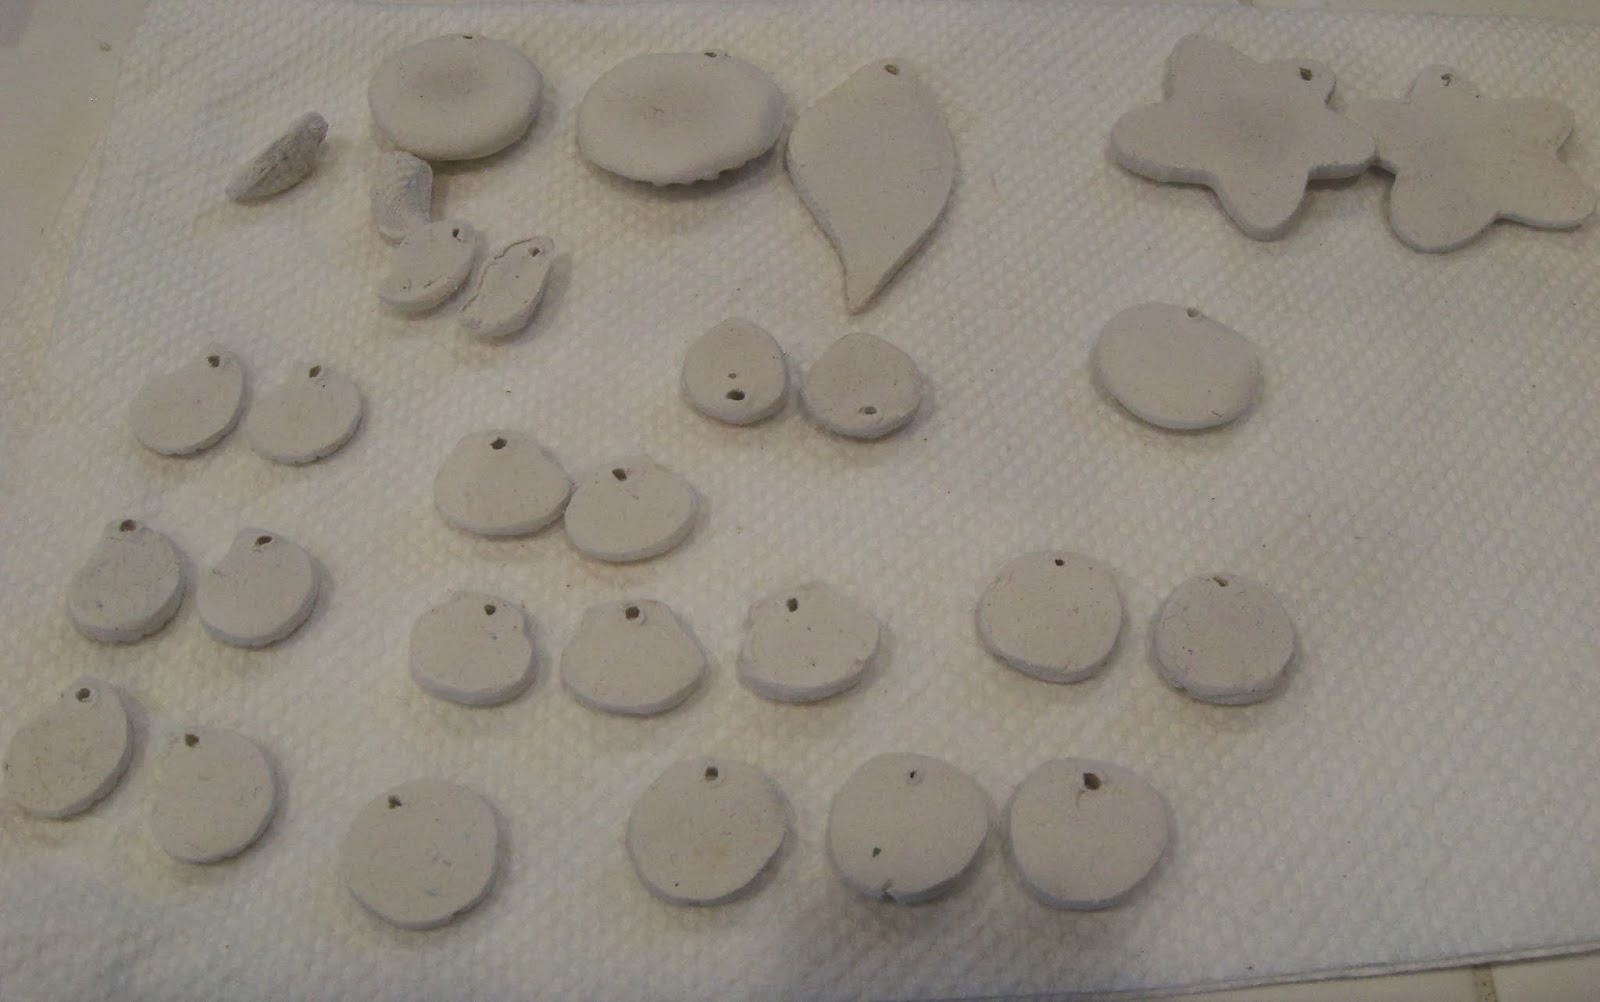
Remember those mystery blobs on my work surface from this post?  Well, they are all grown up and ready to make their debut!  A stray comment that Gail Moore made in her video set me to thinking about expanding the coloring techniques beyond just metal.  I have resisted the siren call of polymer clay for many years...going back to the early '90s and my rubber stamping days...too much additional equipment, time, etc. so I knew that was out.  But I remembered another material that is similar and allows wonderful results without the need for conditioning or baking (thus no need for pasta machine or extra toaster oven) AND has the added benefit of producing extremely lightweight final pieces (always a plus for earrings!).

And what is this wonderful material, you ask?  At least, I hope you're asking because otherwise I'm just talking to myself and that's, yanno, crazy.

Anyway, it's called Creative Paper Clay.  It's primarily used in doll making.  It gives wonderful results as far as molding, and shaping, but is much easier to work with because, as mentioned above, no need for the additional steps. 

So, off I went to purchase some paper clay and a few molds.  I still had the cookie cutters I bought for use with Art Clay Silver years ago so I didn't need much.  Once the pieces had been molded/cut out, I let them dry for 24 hours to get them to a "leather" consistency at which point I did some additional cutting, sanding and shaping.  I didn't do too much as I wanted kind of a rustic, almost fossil look - our whole area was an underwater reef in pre-historic times and my mom has this giant rock in her back yard with fossils semi-embedded in it.  Time and weather have gradually eroded away some of the material to reveal more and more of the fossils.  It's really cool-looking and I wanted to keep that rough-hewn look.

Of course, there was a learning curve with molding some of the pieces and I saved some of the wonkier results to test the various color techniques.  I suspected some would not work due to the more porous nature of the clay, but I was actually pleasantly surprised.  I did try to adjust for this a bit by painting all the pieces with gesso first:


After experimenting, the colored pencil technique seemed to work the best (although both alcohol inks and nail polish came out better than I expected - I will do some more experimenting with those in future).  I suppose it makes sense in a way - paper (clay) and pencils :-)  These were some of the wonky shapes where I experimented with color combinations.  I'm personally drawn to the vibrant combo on the bottom right, but I wasn't sure if anyone else would feel that way so I went with the more faded look on the bottom left.  Oh, and I used this same combo to GREAT effect on some brass pieces that I'll post later...they came out AWESOME!


So, here are my little sand dollars and scallop shells.  I went a little bit bright on the scallops, but since they are tropical ocean colors, I thought it went okay.


These are my little nautiluses (nautilii?).  The bottom two were color experiments - the one on the bottom right is more sand and olive green than it appears in the picture


I used the soft gray/sage/aqua with the pink again on this piece.  This is the same scallop shell, but instead of cutting it out and sanding the edges, I left it with the background and I know it's a little off-center and imperfect, but I kinda like it that way.


This is my favorite piece of everything I did.  Color, shape, everything came out perfect!

Of course, there were some casualties along the way.  I did two large leaves and two large flowers that I cut out with cookie cutters and while the shapes were fine (a little cutesy - as you would expect cookie cutter shapes to be), but it was in the color application that things went really wrong.  I need to learn to grasp the concept of "less is more"...too many colors = mud.  Also, cutesy shape plus super-bright color...looks like a pre-schooler's nightmare.
 
But, there's enough success here to encourage me to keep playing with this technique.
 
KJ

Wednesday, February 19, 2014

She Drills Seashells By the Seashore

I used part of my time off for the long weekend to work on my seashell-drilling experiment.  It took some messing around with the modeling clay to figure out the right thickness to both hold the shell in place and protect the bottom of the water container I was using, but I'm pretty pleased with the results.
 
A couple of things I learned along the way:
 
  1. After a few drilling attempts, the blob of clay starts to get a bit waterlogged and loses its stiffness which means the piece you are drilling starts to sink down into it.  After realizing what was causing the issue, I just replaced the clay blob every 20 minutes or so.  The good news is that the clay never hardens, but it DOES dry out so you can let your first blob dry and re-use it after about an hour or so
  2. Seashells are harder than I would have guessed and dull the drill bit pretty quickly.  I had to lay in a supply of replacement bits so I could swap out pretty frequently
  3. There is such a thing as beginner's luck.  I had much better results with my first group of scrap test pieces than I did with the actual shells.  Some of this was due to #2 above, but I still struggled even after replacing the drill bits.  Possibly because it was taking longer and was more difficult than I had anticipated so my impatience was kicking in?
  4. Making matching pairs is harder than I thought it would be.  I'd get the first shell drilled perfectly and then the second one would break or the drill would skip off the mark a little bit (oh, and the refraction effect of the water is not helpful when trying to find the marked spot and drill right on it!) and the hole would end up slightly off
Still, I think I'm on to something and I just need to keep practicing and being patient.  Also, a Dremel may not be the most optimum tool for this...too bad the drill press moved out when my ex left.  I don't miss him, but the tools were nice to have around LOL!


Here's my first set of practice pieces.  I used broken shell pieces and one shell that already had a hole in its top center that would not have been useful for hanging due to the location.  I actually really like the way these scraps came out (especially the twisty one at the far left of the photo).  Wish I had two that were a little more similar in size and shape for earrings, but I'm still thinking I could use them individually as charms hanging from a center ring with some other bits and bobs.  Also, I used the top shell to determine the best location to put holes and whether I could drill two holes in the same shell.  I was able to get quite close to the edge on one of the holes, but whenever I tried that same placement on any other shell...I ended up with breakage.


This pair came out pretty well other than the fact that the holes are not quite in the same spot.  Refraction effect!


Got closer with this pair...enough so that I think they'll be usable.


This pair went perfectly from the other side (where I was drilling from), but once I turned them over  to take the photos, I realized there is some minor chipping around the holes.  What do you think...still usable?


This pair already had some chips on the end - they came that way from the beach.  That white blob near the hole on the shell on the right is a bit of the clay that is still stuck to it.  For the most part, that wasn't an issue - it will come right off.  I just didn't notice it before I took the photo.


This one was PERFECT!  And on it's way to being a perfect pair...until the second one broke :-(
 
I did lots more playing over the long weekend...some with great results and some...uh...not so much LOL!  Stay tuned to see them.
 
KJ

Friday, February 14, 2014

You Can Never Have Too Much (Bead) Porn

In 2014, I'm making a concerted effort to restore some work/life balance soooo...I'm taking the day off work today to have some "me" time.  I'll be spending the day in the studio kitchen getting some creative time in and maybe I'll even be able to squeeze in a non-Disney/Pixar/animated movie!
 
In the meantime, please enjoy some bead porn.  Some of this is the tail end of the 2012 and the rest is FRESH porn...hot off Etsy and some of my other favorite addiction sites.


Swirly, verdigris-patinated spacers from Linden Avenue Designs.


As part of my plan to re-focus on ocean-themed inspiration and designs AND in honor of my fantastic turtle adventure this past summer, I decided to troll around Etsy looking for some turtle-related beads.  I found some awesome stuff and a new collecting addiction was definitely born.  This little charm is also from Linden Avenue.


As is his big brother...this larger pendant.


Although I plan to attempt patinating the one above with my own techniques, I couldn't resist this already-verdigris'd version, too!


These beauties came from Barb Bechtel's Etsy shop which is now closed.


Gorgeous copper toggle from Kristi Bowman.


As is this wonderful butterfly bracelet link.


Gorgeous bronze patinated flower from Thea Elements.


And a pretty pink/olive green bracelet link from the same shop.


Let's see, I've worked my way through brass, copper and bronze.  How about some gold, texturized links?


And tiny star charms...


And birds...


And hummingbirds with flowers.  All four of the above are from Sweet Rock Candy Beads.


Etched lavender and purple lampwork beads by Outwest.


Black lampwork with touches of silvered ivory and green from the same shop.


Stunning lampwork disk beads in shades of peach and amber from Gardanne Beads.
 
And look, I made it all the way to the end of the post without making the obligatory (bead) porn/VD (Valentine's Day) joke.
 
Oh wait...DARN it!
 
KJ

Thursday, February 13, 2014

Experimental Results

First off, thanks to everyone who has been kind enough to leave comments!  It lets me know that I am not just out here talking to myself for no reason and therefore possibly I'm not (completely) cray-cray :-)  I'm glad y'all are enjoying my various experiments.

Here are a few more results:


I took these brass components that I purchased on Etsy and transformed them with alcohol inks:


Then I sanded the results to let some of the metal show back through.  I still feel like they might need a little extra oomph and since I think they were originally intended to have flat back crystals glued in the center of the flowers, I may still do that.  Or not.  Decisions, decisions...
 
Then, I decided to keep going with the inks for a while.  I really love the earrings that I did using Barb Bechtel's painted polymer clay ovals as backgrounds for charms.  She doesn't seem to be actively selling any more so I decided I needed to come up with a way to make similar background pieces without delving into the polymer clay world.  I think I've got enough going right now without investing in a pasta machine, clay, tools and another toaster oven LOL.  I found some wood disks and other shapes in the woodworking aisle at Michael's and since I now have the ability to drill holes where I want...I thought they might work perfectly.  I gave them a light sanding and prepped them with gesso (tried the inks on the bare wood and...blech...didn't like the results) and got to work with the inks and the blending solution:


I was going for sort of a light-colored center with darker color around the edges.  This pair is a combo of the colors "butterscotch" (mixed with a bit of white to lighten it) and "lettuce" from the Ranger/Tim Holtz alcohol ink line.


Then I went with the "lettuce" as the center and "stream" around the edges.  It was a bit blah at first so I added some metallic gold.


I lightened up the "butterscotch" with a lot more white, then added some pink, violet and gold


These shapes are a thinner wood that is more absorbent so the colors don't come out as intensely.


Also, I sanded the pieces afterwards to give them an aged, faded look.  I really like the effect!  These will work perfectly with the seashells I gathered. 


Then I went really nutty with the drill and added more holes so I can make lots of dangles for the bottoms.  I can see that once again my deteriorating eyesight has betrayed me and I have to get my reamer out to do a bit more filing on the holes of the piece on the right.
 
I also did some more experimenting with nail polish. 


Remember these brass butterflies?


Here they are after I drilled holes, painted them with nail polish and then sanded and polished them to bring out the raised metal areas again.  I'm really loving this pink/orange/green color scheme!


Got these "brass" seahorses from the same source as the flower links in the first photos.  I lost one to the torch as it turns out they aren't REALLY brass, but some kind of other material that...melts when it gets hot.  So, no more torching for this stuff!


But, it works great with nail polish.  I feel kinda sorry for that one lonesome seahorse whose partner got melted.  At least he looks pretty!


Even though they aren't really brass, they still shine up like brass once they've been sanded and polished.  This is an olive green/purple sparkle color combo.


This is a bright, almost fluorescent green/turquoise combo and turquoise sparkles on the fins.  Sorry for the blurry photo...I took all these pics in about 60 seconds in the morning before I had to leave for work.  Probably NOT the best plan, but I've been getting home after dark every night and was tired of waiting until the weekend to take the photos.  Why isn't it Friday yet???!!


This probably isn't the final combination, but this is my basic idea of where I'm going with all of this - a painted charm of some sort hanging in front of a hand-painted background piece.
 
I've got so many ideas right now that they are keeping me up at night!  I wish I could do more creating on weeknights, but by the time I get home, get the kid fed and the kitchen cleaned up and go through his homework...I'm just mentally exhausted.  SOMETIMES, I can do rote work like sanding/metal prep or laying down the gesso layer, but I've learned the hard way that any real creative work I try to do when I'm in that state will almost certainly go wrong.  Either I will make a mistake that has to be taken apart, or the design will be ho-hum (or downright fugly).  As frustrating as it is, I do better when I wait for the right time and state of mind.  I kinda haveta be "in the zone" and forcing it just doesn't work.
 
Seriously, why isn't it Friday yet?????!!!!!
 
KJ

Wednesday, February 12, 2014

Drill, Baby Drill

Now that I finally have the Dremel figured out and have tried all these new techniques, I couldn't wait to take the best of what I've learned and start expanding on it.  Not only has the postman been very busy delivering packages to me over the last week, it also occurred to me that I can finally realize a long-time dream of making better use of the wonderful resource that is right in my backyard...California's beaches!

I have to admit, I'm still a little bit nervous about accidentally drilling my finger, but I'm sure if I keep working, I'll get over that eventually.  I bought some putty clay and am going to try embedding objects in that to hold them stationary while I drill them so I can take my fingers out of the danger zone.  I tried various versions of tweezers, pliers, clamps and vises, but they all either didn't hold well enough or did damage to the brass or other small, delicate items I wanted to drill.

Although I didn't get any jewelry pieces completed this weekend, I was very busy in the studio kitchen prepping metal, practicing with the drill and playing with some new molds I bought.  The kid and I also took time out to hit a favorite non-marine-preserve beach to do some treasure hunting.

First up was drill experimentation:


I wanted to start with something softer and easier than metal.  I had a drawerful of experimental resin/glitter combos that I had never put wire loops on and thought they'd be perfect for my first real significant attempts at lots and lots of drilling.  They worked out pretty well - the drill skipped off a rounded corner here and there and I ended up with a couple of off-center holes, but those were my fault because I was eye-balling the hole placement rather than slowing down and taking the time to properly measure and mark my spot - that whole impatience thing at work again.  But most of these are now useable and while I know they are kind of silly, glittery, tween-girly, there's a part of me that likes that kind of thing so I was thinking if I maybe get some bright colored wire/jump rings to put with them I could end up with some fun designs.


Next up was actual drilling on metal.  I had a bowl of water nearby to drop pieces into if they heated up too much from the drilling.  These all worked really well.  The hardest part was deciding where to put the holes and did I want a hole at the top AND the bottom or just the top.  After that, it was time for sanding and application of gesso.  I'll be using either Prismacolors or alcohol inks on these pieces and then I saved some others aside for use with nail polish and heat patina.


Okay, you can't really tell what these are because this is still sort of a secret, hush-hush project as I'm not sure where I'm really going with the idea yet.  I did get a bunch of molds and cookie cutters and started playing around with them. All the pieces are flipped over so the back sides can air dry sufficiently.  Once they are dry in a few days, I'll be trying out some coloring techniques to see what works best - they may be too absorbent for the liquid types of colors, but I'm thinking the pencils will look terriffic.
 
And then it was off to the beach to see if I could make a long-time dream into a reality.  For years, I've wanted to incorporate more local, natural materials into my designs, but I was always held back by the inability to put holes/attachments where I wanted them.  Part of the reason I originally bought the Dremel was to overcome that issue and I'm so excited to get the chance to finally try it


In thinking about kick-starting my creativity and design process this year, it occurred to me that my best designs have always been inspired by the ocean.  No surprise as I've always had a special connection with the sea starting when I was three years old, living on Oahu, and first learned to swim in the ocean.  I want to concentrate more on that aspect of my designs and adding seashells like these that Ryan and I gathered from the local beaches is a great way to start.


Most of what we found this trip are the elongated "angel's wing" shape of small clam shells, but we did find a few of the more round shape (see upper left corner).  No real matching pairs out of the round group, although we tried really hard to find some.  I ended up with a couple of pairs that match in size, but they are so different in color that I don't think they will work for earrings.


Here's a more closeup view of the angel wings - found lots of them with really great coloring.  Many have pretty stripes in shades of pink, lavender, blue, purple and even yellow.


You can see the round shapes more clearly now at the top of the picture.


While we tried to mostly gather whole shells, I did grab a few fragments because I thought they would make good initial test pieces.  That way, I won't have to worry about learning on the "good" shells.  Also, a few of the fragments, like those orange scallop shell pieces in the center of the photo, look nice enough on their own that I could maybe find a use for them in the right design.
 
So, that's the next planned experiment.  I'll let you know how it goes, but fingers crossed that I can pull it off.