Friday, January 31, 2014

Cork Pop Part 3

Wheeeee!  I can't stop!  At least not so far.  AND, I've been lucky enough that the kid's schedule has been busy enough elsewhere so that I've actually had some free time.  I kinda forgot what it feels like to not only have that, but have it coincide with me not needing to pass out from sheer exhaustion.


Just in time for the upcoming Valentine's Day holiday - cuter ceramic hearts imprinted with a scrollwork design and glazed in a dusty lavender hue.  I paired them with some faceted Czech glass rondelles in a swirled teal/purple Picasso color and wire-wrapped everything with dark brass wire, jump rings and earring hooks.


From there, I moved into thoughts of summer time and tropical drinks courtesy of these cute polymer clay charms from Barb Bechtel.  She used to have an Etsy store called Floridity, but it appears to be closed.  I think she still has her own website under Second Surf, but I popped onto it and don't see much activity.  It's a shame because her hand carved/painted polymer clay pieces were a staple for my bead stash.  Guess I need to enjoy what I have left.  The top beads on these are dyed tagua nuts and Japanese seed beads.


I bought these charms in the same grouping with the ones above and both sets secretly reminded me of the old Fruit Stripe Gum (remember their Zebra mascot?).  I added bleached wood disks, turquoise tagua nut barrels and lime green Japanese seed beads.


These oval disks are also from Barb.  I bought a set of six in varying shades of yellow, green, blue and turquoise.  The front beads are carved and dyed howlite - and they are either shaped like starfish or flowers depending on your point of view.


And just to show how your designs can be influenced by everything you see...I swear I wasn't consciously trying to re-create this flowering tree from Lana'i.  In fact, I didn't even think of it until I was cropping/re-sizing the earring photographs and realized the similarity.  The brain is a curious thing.


This is another pair of ovals from the same set but with lighter, less intense colors.  I added blue stone disks, sterling silver seahorse charms and lime green seed beads.


While I was on a roll with all things bright, I picked out this cute pair of lampwork glass disks with white and yellow daisies on an aqua scroll background.  They didn't need much so I just added some bright yellow Chinese crystals and some Bali silver accents.


I scored some darling enamel work from Barbara Lewis a while back.  The set included these black disks with white dots on them.  I added sterling silver scroll heart charms, dyed red wood beads and Bali silver bead caps.  After I finished them, they reminded me an awful lot of Minnie Mouse...and I'm not sure whether that is a good thing or a bad thing LOL!


That same set included these links.  I added yellow Chinese crystals at the top and tiny red Czech glass rondelles at the bottom.


The last part of the set were these darling flowers.  Barbara enameled bead caps in a pale pink and placed them in the center of these glossy black enameled flowers.  I added mint alabaster lampwork ruffled disks, pale pink Swarovski crystal pearls and some touches of Bali silver.
 
 
I will get these listed in the Etsy shop as soon as possible.  Most of the other new items have already gone up.  Now, I'm hoping to get home in time tonight to play some more with my color experiments!  Wish me luck!
 
KJ

Thursday, January 30, 2014

Keepin' It Goin'

I'm still getting caught posting pics of my extended beading spree.  Gosh, it feels so good to be creative again.  Can't believe how much I missed this!


This bracelet features etched lampwork beads from Outwest, shiny copper Mykonos ceramic disks and Chinese crystals.  While they are not as high quality as Swarovski, you can't beat them for sparkle or for price.  The toggle is patinated copper from Patricia Healy.


I liked the look so much that I did it in another color-way using beads from the same lampwork vendor, matte black ceramic spacers, and I swapped out the copper for touches of gold. 


The clasp...was a mistake. I thought it would be kind of cool to have a black clasp and I had this carved and dyed tagua nut toggle in my stash, but once I took the photos, I realized it wasn't nice enough stand up to the rest of the beads and that it kind of dominated the design in a way I didn't like. I have since replaced it with a vermeil toggle and it looks much better. It's funny how sometimes I have to "live with" a design or even see it in a photo for a while before I notice something that's bugging me.


Never one to miss the opportunity to beat a good idea into the ground, I made a necklace, too.  This time, I added in some deep-teal-encased-in-clear lampwork beads along with the etched beads from Outwest. 


The bright copper pops so well against this color!


Chinese crystals, copper daisy spacers, and seed beads are the accents.


Copper chain finishes off the back half of the necklace and I added a small copper toggle clasp and a wire-wrapped dangle for an extra touch.


I remember when I bought this focal from Summer's Studio thinking that it would be a challenge for me because of the color scheme, but that turquoise lampwork disk was sitting on my workstation left over from anothe project and happened to roll next to the focal and as soon as that happened, I was off to the races with this design!


The focal really is stunning with that dark chocolate background.


I love these orange crackle agate barrels.  Great shape and they really glow like they are molten.


Here's that lampwork disk that started it all.


I finished off the back half with dyed nut barrels in a yellow-beige color that matches the sunflowers on the focal PERFECTLY. 


A little bit of chain makes the length adjustable and I added this cute bronze dragonfly charm (also from Summer's Studio) as a special accent.
 
 
KJ

Wednesday, January 29, 2014

What Do You Do When...

...your kid flips his retainer into the toilet?

No, I'm serious.

Because this is the kind of thing that I have to deal with.

Am I a horrible mother to consider that soaking it overnight in hydrogen peroxide or alcohol is an okay/safe method to render it wearable again?

Or do I make the "Hi, it's me again.  Yes, I know this will be the third time we've had to replace his retainer, but at least this time it didn't get lost/smashed...it just fell in the toilet" embarrasing phone call to the orthodontist

Again.

Sigh.

KJ

Tuesday, January 28, 2014

Experimentation

As part of my plan to re-dedicate myself to both the blog AND to not blocking up the creative flow this year, I decided to get caught up on playing with some new techniques and indulging in experimentation.  Believe it or not, this is somewhat difficult for me. 

It's not just the time and money to get all the supplies, get them laid out, actually have the time to play around with them and then, of course, clean up afterwards - although that is definitely one of the obstacles I struggle with.  Really, though, the bigger obstacle is fear of wasting the supplies with experiments that don't turn out well (for definition of well I mean at least nice enough to wear myself if not actually sell).

This often leads me to either avoid experimenting at all or to stop if too many things turn out really ugly.  I'm a harsh critic, too, so it can be especially difficult to get something completed that meets my standards.

Still, I decided to try to squash those impulses as much as possible and let go.  I put several new technique books/DVDs on my Christmas list and Santa was kind enough to oblige me by dropping a few into my stocking.

I've read them all, but the one that seemed the most approachable place for me to start was "Coloring on Metal" by Gail Crosman Moore.  After all, I'd already taken a step into this world in playing with the Vintaj patinas and I knew I had some embossed blanks and other pieces of brass and copper ready to go so I wouldn't have to lay out too much in supply money to get started.

This DVD covers several techniques for coloring on metal:
  1. Alcohol inks
  2. Heat patina
  3. Nail polish
  4. Prismacolor pencils
  5. Enameling
Overall, I found the video very informative and helpful.  I think it could have benefited from more close-up shots of what Gail is doing and of the finished pieces, but it was mostly well-done.

I knew right away I wouldn't be doing the enamiling.  Although I have a hot head torch (and even a VERY old canister of MAPP gas which would, I'm sure, have to be replaced), I just don't have the right area to set up for this.  Something to put on my "bucket list" for future, though.

I do have a micro-torch that would work for doing the heat patina, but the one item I would need to purchase to do this is a fire-brick and, since I was eager to get started and didn't have a lot of time, this technique also went on the "to be tried in the future" list.  Although, since then, I read on Gail's website that she has even achieved some interesting patina results with just putting brass stampings on a cookie tray in the over at 425 (or something) so I may give that a try.

I have a ton of alcohol inks and have already played with them from back in my rubber stamping days so I was pretty sure I knew how they'd behave so I'll definitely be doing those next, but I wasn't quite as excited about them

So, that left the nail polish and the Prismacolor pencils.  Luckily, I already had a set of Prismacolors (again from back in my stamping days) so the only supplies needed to use them as per the video are a paintbrush, some gesso, and some turpentine for blending.  I duly purchased those items at Michael's and got to work.

And wow...did my results SUCK!  I thought this would be so easy and I liked the idea that the pencils would give me more control of color and placement than using a brush with a liquid medium like alcohol inks.  And that part was true.  I think where I went wrong was in selecting the particular metal pieces I wanted to color.  In the video, Gail uses a large brass stamping of a leaf to demonstrate this technique so it is a mostly flat surfac with very little texture to it.  I used a couple of the metal blanks that I had embossed with the Big Kick and I think they had too much texture.  Also, she preps all of her pieces with steel wool to rough up the surface and I was unable to do that because despite stops at FOUR different stores (2 hardware and 2 grocery stores), I CANNOT find steel wool!  I'm not sure if it's some kind of temporary outage or if there's some wacko California environmental law that has made steel wool illegal (which wouldn't surprise me AT ALL).  Anyway, I know it's ridiculous, but I eventually had to give up because I was spending all my play time driving around to stores looking for it.  I used sand paper instead.  It works...sort of...harder to get into all the nooks and crannies like steel wool can.

Sooo...that was disheartening (see comments about hating to waste supplies above).  I refuse to give up, though, and have ordered some larger, flatter brass pieces to experiment on to see if I can't achieve better results.

That left nail polish.  Now, if I haven't mentioned it before, I am a total nail polish slut.  I loves me some nail polish...and the sparklier and brighter, the better.  I have oodles of it, can never actually POLISH my fingernails (between art projects and the parrot's beak...it's not worth it), but I keep buying it anyway.  Even Santa got into the act and brought me a couple of new colors for Christmas LOL!  So, here, finally, was something that I already have a ton of and needed to find a use for anyway.

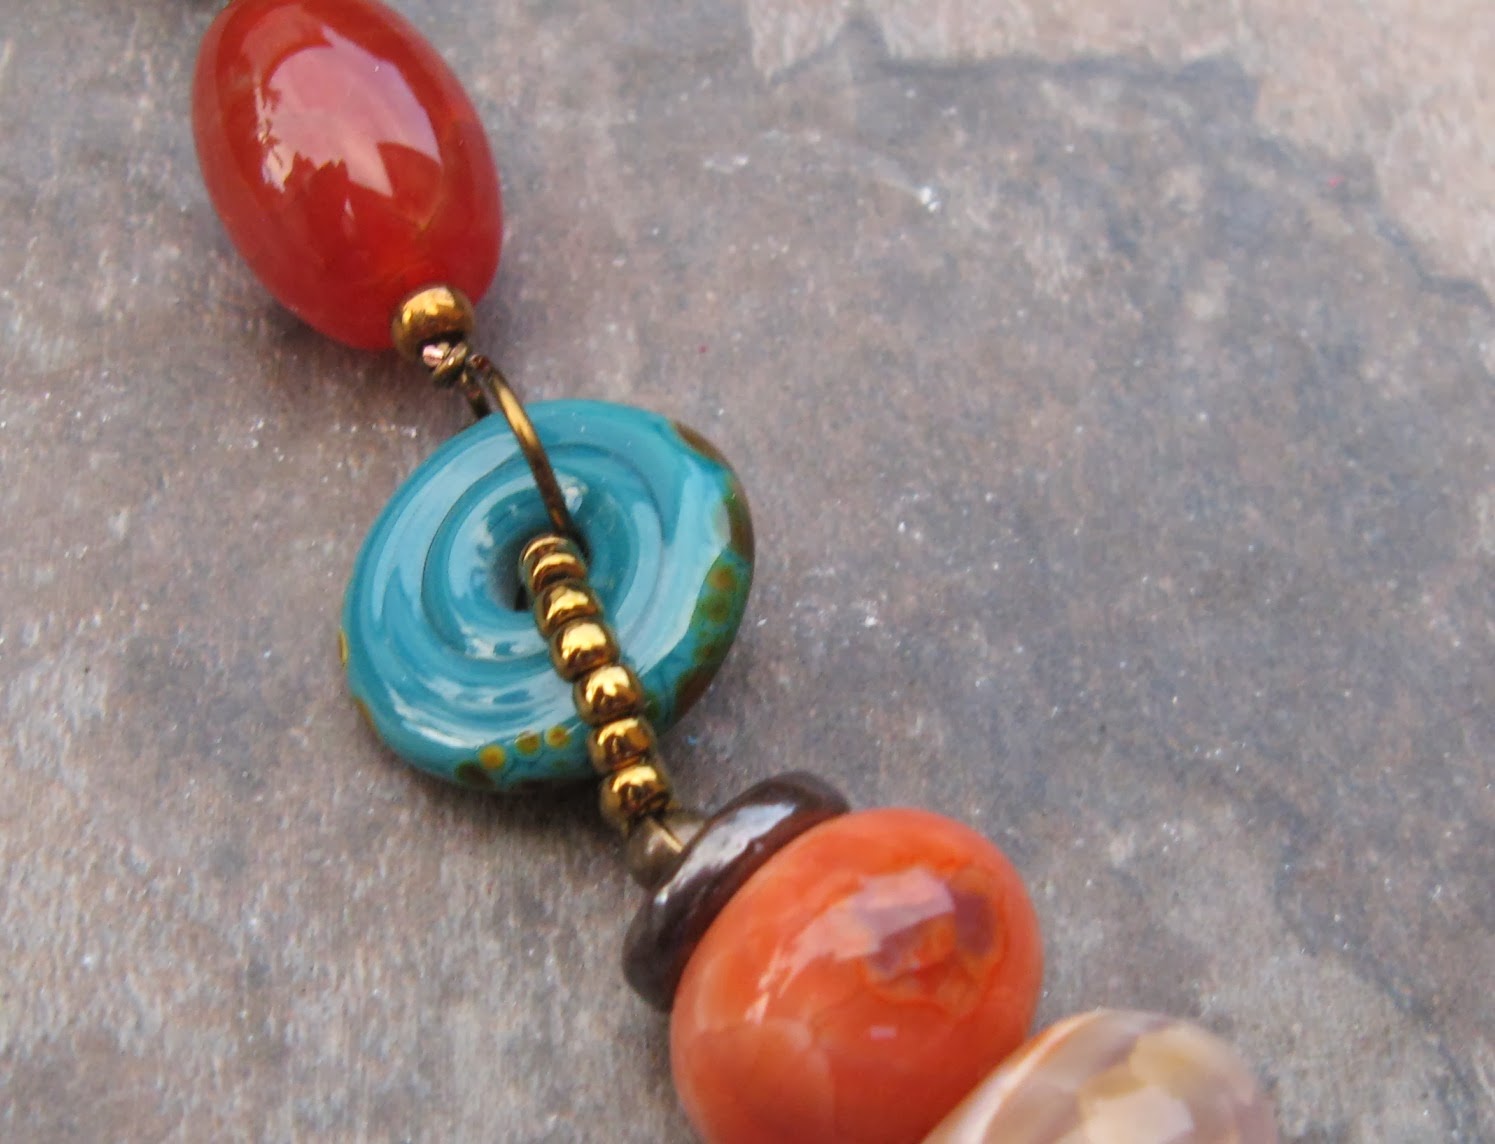
I set to work using just about every different piece of metal I could find from some brass chain links in the shapes of dragonflies and shells that I already had in my stash to some pewter pieces I picked up at Michael's:


These leaves are actually a textured "mesh" so they are very lightweight.  I used a dark green polish with a subtle glitter in it and some burgundy polish for color and then I added a splash of gold glitter polish on top of that.


These are pewter angel wings from Michael's.  I used a couple of different shades of aqua and teal polish and then I sanded down the high points to let the silver show through and added some of the gold glitter polish as well.  Oh, and I'm just going to confess now that the glitter polish?  Yeah, it's like crack for me and I kind went nuts using it on everything.  The effects are actually much more pronounced in the photos than they are in real life.


These are two links of the brass seashell chain.  I did a base of the aqua and teal and then went over the top with some green glitter polish.  I was running short on time and had to take my photos before I finished the final sanding and polishing on pretty much all the pieces here.  Once I sanded these - the "ribs" of the seashells are a shiny gold now and really make a nice highlight in contrast with the recessed areas.


Same chain links.  Base is a purple polish with some berry highlights and a confetti glitter polish.  Again, the sanding and final polish came later and really highlighted the "ribs" of the shells.


Even I admit that I went too far on this one.  There are these shells on the beaches here that have, if you look closely, all the colors of sunset in them:  yellow, pink, lavender, purple.  I kind of had them in mind when I kept adding colors here, but it didn't really work out.  The base is a pale aqua and then I added some lavender and pink and did the green glitter over the top.


These might be the best of the shells.  I started with a dark, forest green and added some violet and lime green highlights and then used the confetti glitter.  I'm picturing these as deepwater shells because of the darker coloration.  Again, they really came to life once I sanded/polished the spines to shiny gold.


These are the last three links I had of this chain.  Gail mentions in her video that the cheap $1.99 nail polish from the drug store works best soooo...since I had to pop in there anyway to pick up some other stuff, I perused the cheapo polish section and I agree with her - you can get some really insane colors and since the polish is so cheap, most of them are transparent colors which works great on the metal.  I used a transparent lime green on the dragonfly bodies and a transparent, metallic teal on the wings and then I went over it with some touches of green glitter.  Once I sanded these, the raised metal dots on the wings became shiny gold and really made the wings look spectacular.  So far, these and the teal angel wings are my favorites.


This is another pair of the pewter angel wings from Michael's.  Last summer, I bought these kinda cool dual-ended nail polish tubes at the drug store.  One end is a solid base coat (in this case, a deep purple) and the other end is a clear base with bits of holographic material matched to specifically work with the solid base coat in the first end.  I never could really get it to work right on my nails, but it looks so cool on these wings.  I painted on the purple, sanded to get the raised areas to show up, then added some of the holographic pieces.  I sanded and polished again after this photo was taken to make the raised areas shine more silvery.


This was my one not so exciting result out of the whole batch.  My biggest problem was I couldn't figure out what color to make the bird and that pale aqua just ended up being blech.  I tried jazzing it up using some of the holographic bits and quickly learned that it doesn't work very well on any color other than the one that it comes with.  However, I decided to show this piece because it's one of the few I had time to sand...and you can really see how the bright copper comes back in the raised edges around the outer circle.  It's kind of a shame because I really liked the shape of this piece.  I'm wondering what would happen if I hit with nail polish remover and tried to take the color off and re-do it.


More of the mesh leaves from Michael's.  This mixed turquoise, berry, and copper with some glitter.  They look awful and muddy in the photo, but the real-life result is much prettier.  I'm not sure how that happens, but it's true.


Same with these...the copper looks really muddy, but in real life, it's this amazing metallic polish and looks great.


I'm not sure what the base metal is on these, but they have a gold-colored finish and I found them at Michael's.  I wanted to get more, but they were the last ones.  The two outer leaves are dark green polish with some gold glitter and the center leaf, I added a little bit of berry down the center and some confetti glitter around the edges.


These pieces started out a very dark, aged copper metal color.  I picked them up at a bead show and ever-so-helpfully managed to lose the name of the vendor they came from.  I try really hard not to do that and am usually pretty organized about keeping a business card or sales slip or label with things so I know where they came from, but these were some of the last items I purchased before my "beading hiatus" began and some of my systems kind of fell apart during that time frame.  Heck, I'm glad I even found them LOL!  Both components are meant to be leaves, but I kind of thought the more feathery one could be layered like this to sort of look "flowery."  The leaves are dark green polish with a few hints of pink/berry and then the edges sanded.  The "flowers" are dark purple/berry with some touches of holographic bits.  I think they will make awesome earrings when I link them together.

So, there are some of my "experimental" results.  Not too shabby for my first time and I got more fun and use out of my nail polish collection than I ever thought I would so it was worth it just for that.  Of course, this only fueled the never-ending need for "more things to try" so I immediately went on the internet and searched out more brass stampings and other metal pieces to play around with.  Can't wait to re-try the pencils and to break out the alcohol inks.

And I still have a few nail polish colors I haven't tried yet...

KJ

P.S. If anyone has a good on-line source for steel wool (so stupid, I know, can't believe I'm having to ask this) or fire-brick (yep, hardware store was out of this, too), let me know.

Monday, January 27, 2014

The Last Day

Okay, I promise the annoying vacation photos and stories have come to an end.  But, I just had to bid a proper Aloha! to what was truly the trip of a lifetime. 


Here's my mom and Ryan as we had dinner on the patio of Hula Grill at Whaler's Village for the final time.  We ate there on our first night and enjoyed it so much we had to go back.


This is the view from our table looking to the left at Kaho'olawe.


And this is looking to the right at Lana'i.


And there's our final sunset (complete with sailboat sailing off into the distance).
 
While I expect to go back to Hawaii (and fairly soon - fingers crossed!), I just can't imagine that any other trip will equal this one.  Everything was just spectacular...AND...I swam with turtles!!!  I can already tell that some of the island influence has seeped into my designs with hotter, brighter colors and ocean-inspired elements like wood, stone and sea creatures.  I look forward to expanding more on that theme over the next year - I've always thought my best designs always link back to the ocean in some way and it's a nice change from the cooler, foggier colors of So Cal beaches to do something a bit more tropical.
 
So, finish the last sip of your Mai Tai and take off that flower lei and it's time to end this trip to the islands - thanks for joining me (and also, don't you love how I made a vacation last 6 months?! LOL)
 
KJ

Friday, January 24, 2014

Cube Beads - Why Do You Torment Me So?

Cube beads.

Sigh.

I have so many of you.  I rarely use you, but I keep buying you anyway.

For no reason that I can figure out.


In fact, it only really occurred to me after I made this pair of earrings with the aventurine cubes at the bottom that I so rarely use this shape in any of my designs and I thought "huh, that is kind of strange."
 
Then, later that same day, I found myself perusing beads on Etsy and filling my cart with a bunch of cube beads like these:


Shinyyyyyyy.....
 
And then I thought about my earlier thought and thought "why would I buy more cube beads when I just acknowledged that I rarely use them." 
 
Cuz...duh.
 
So, then I started trying to figure out what the issue is.  Obviously, I don't loathe them on the surface because that would stop me from buying them at all.  Believe me, there be plenty o' ugly beads out there in the world that I reject on sight. 
 
Or, yanno, not necessarily "ugly" per se, but just "not me."
 
However, when it comes to designing, I seem to always skip past this shape and prefer round, oval or rondelle shapes.  In fact, if you look at the cubes I used in the earrings up above, you will notice that although TECHNICALLY cube-shaped, they have rounded corners and so are more of a softer, mushier cube.
 
I must not like hard edges on things.  Apparently, I like everything soft, rounded and ground down.  I wonder if it's a family trait as Ryan has a noted preference for very soft things.  As a baby, he rejected all but the very softest of blankets (which is still on his bed to this day), he picks his stuffed animals based on which feels the softest, and just yesterday I caught him trying to take the blanket off my bed because he had determined that it was even softer than the one on  his bed.
 
So, do I just embrace the soft, round world I live in, or do I challenge myself to try using cube or gasp! triangle-shaped beads?
 
Do you have a bead shape that confounds you?  What do you think the reason is for that?
 
KJ

Thursday, January 23, 2014

Cork Pop Part 2

Yep, there's more.  And then there's more after that.  I really did go nuts LOL!


These are ceramic seashell charms in a warm, honey color.  Originally, I was working with that earthtone color scheme, but it just kept coming out kind of blah.  Finally, I decided to try the brightest beads I have - some carved and dyed tagua nut rings and cylinders and I loved the resulting hot, tropical look.  I feel very Miami when I look at these.  


These purple patinated rings are from Miss Fickle Media and were the perfect pairing with these spacey, swirly pinky and purple lampwork beads.  I added Chinese crystals in a hot violet color and some bright copper spacers and earring hooks.


I managed to fit in another necklace.  This one started with a beautiful ceramic shell pendant that shimmers with different shades of blue, pink and lavender.


I added some swirled lampwork nuggets to pick up the colors in the pendant.


And then did my version of an updated "puka shell" necklace by using these bleached wood disk beads.


I added in some deep blue coin pearls to keep with the ocean theme. 


I added twisted nuggets of blue shell for the back half of the necklace and an extender chain so the length is adjustable.
 
 
I have some more jewelry coming later - just got the photos taken over the weekend and still need to do the all the editing to get them ready to post.  I also spent more time experimenting with techniques...more about that later :-)
 
KJ

Wednesday, January 22, 2014

Cork Pop

So, remember how I was mentioning that finally getting to sit down with my beads for what I THOUGHT was going to be a short, couple of hours of beading...and it turned into a several days marathon.  Apparently, there was a lot of backed-up creativity to get out of my system because I have been creating like a madwoman ever since.
 
I could definitely tell that I was rusty, though, as the first few designs are...nice...but they didn't make my heart go pitter-pat or give me that "YES!  THIS is right!" feeling.  But, I noticed improvement as I moved along so I think it just took some time to get all the mental gears rolling smoothly.  I've placed these in no particular order so I'll let you wonder which were the tougher, beginning ones and which were later in the process...


These earrings featur patinated brass filigree pieces (not done by me - these were purchased on Etsy) to which I added faceted lemon quartz teardrops (center - they are really a pale yellow-green but that's hard to see against this background), and two different sizes and colors of faceted Czech glass rondelles.  I used vermeil headpins and daisy spacers as accents.


These stunning copper leaf dangles are from Kristi Bowman.  I added copper spacers, Czech glass rondelles and genuine turquoise rondelles.


Lampwork glass disks in deep midnight blue with green, light blue and gold aventurine inclusions are from Unicorn Beads.  I added vermeil flower dangles and faceted Czech glass nuggets that mimic the swirling green inclusions in the lampwork.  These look amazing in full sunlight when the glass goes a bit more transparent and sparkles.


These pretty cast pewter links set with crystals from Lynn Davies gave me a Jane Austen-time period-vibe.  I wanted something feminin and dainty to pair with them...and what's more fitting for that than pink and pearls?  I added glowing pink lampwork disks on top and tiny, white freshwater pearls on the bottom and threw in a few accents of Bali silver as finishing touches. 


More of Kristi Bowman's gorgeous copperwork...this time adorned with snowflakes.  It's been so darn hot here that I was trying to draw the Polar Vortex westward!  Accents are kyanite rondelles and Chinese crystals.


Fun, whimsical lampwork squares have bright accents of purple and blue and I accented them with black Mykonos ceramic disks, Chinese crystals and some touches of silver.  


I may have gone overboard at Kristi's shop (yeah, I know, doesn't sound like something I'd do AT ALL, right?).  These dangles are patterned with a sea urchin texture and my son actually picked out the accent beads (I was still frantically beading even after he came home LOL).  I was weighing a couple of options on my work station as he was walking by and I told him I needed his opinion.  He didn't hesitate to pick these gorgeous turquoise lampwork rondelles and I balanced out their brightness with some earthy copper pearls.
 
 
Okay, I finally got brave enough to move beyond the earring stage.
 
A couple of years ago, I packed some "travel projects" for a trip we took to Carpinteria. I never used all of the materials I took and the ones that were left over remained tidily packed away in my travel case ready to grab for the next time I thought I'd be taking a trip that would have enough downtime to make it worthwhile (obviously, Hawaii didn't qualify!) Since everything was already picked out and color-coordinated, I didn't have to waste time during my recent beading frenzy to pull supplies from the hoard of Smaug beading stash. I decided to dig into my travel case and break these beads out of "jail."


I started with this gorgeous swirling ceramic pendant in shades of soft teal and sage green with flecks of bronze and blue.  I added drilled beach glass links, bleached wood slices, Czech glass disks, aventurine cubes and a pretty lampwork disk bead flecked with bronze speckles.  It reminds me of a foggy, winter California beach day.


Here's a closeup of the pendant.  The clasp is a brass hook from Patina Queen that hooks onto the round, brass link in the center.  I don't do front closures that often and thought it would be fun to try.


I made it a slightly longer length that my usual 18-20" as well...again, just to try something different.


I had a few leftover accent beads so...time for some coordinating earrings.  This pair features the Czech glass disks and aventurine stone cubes from the necklace. 


This pair uses the wood slices from the necklace and I've added some twisted brass rings and tiny, verdigris-patinated sand dollar charms.
 
If you liked any of the designs, I should have them posted on Etsy over the next few days.  And...I'm still not done...stay tuned for more!
 
KJ